

How To Replace A Park Assist Camera System On A Chevy Silverado
Nowadays, automotive technology is advancing quite fast. Things we once thought of as an absolute luxury are becoming commonplace. Some things are even industry requirements. For example, park assist cameras used to be a luxurious feature on higher end trim levels. In 2014, the U.S. Department of Transportation made it mandatory for all new cars to have a backup camera. Backup cameras are something modern drivers have come to depend on.
If you own a Chevrolet Silverado with a broken park assist camera, you came to the right place. We'll show you how to replace it.
Ordering A Replacement Camera
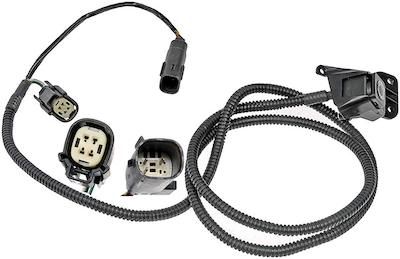
The first thing you need to do is to order a replacement part. We carry genuine OEM parts for all makes and models, including Chevrolet Silverado trucks. We offer wholesale pricing for all our parts, so you'll get a good deal when you order from us. Check out our catalog of park assist camera system parts for Silverado 1500 trucks. Please contact us if you need help finding the right part number(s) for your truck.
Locating The Module
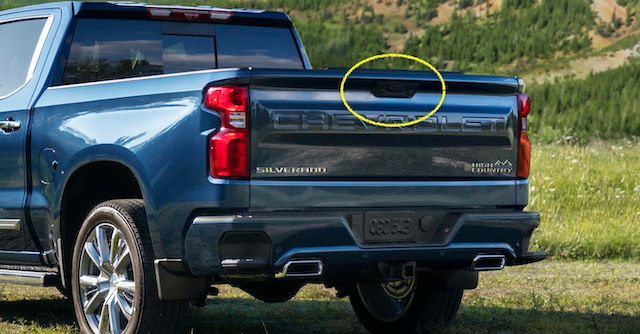
Integrated camera module placement, circled in yellow, on a ‘22 Silverado. Image Credit: Chevrolet
Once you have all the replacement parts you need, it's time to start the replacement process. If you're not sure where to find the park assist camera on your truck, read on to find out how to locate it.
A park assist camera, for reversing purposes, will always be located on the rear of the vehicle. The module itself can be in various places on the rear of a vehicle. The specific location depends on the type of vehicle you have. Since we’re looking at replacing the camera on a Chevrolet Silverado, the factory backup camera location will be in the tailgate assembly.
The integrated camera module, circled in yellow, can be seen below on a ‘22 Silverado.
Replacing The Camera Module
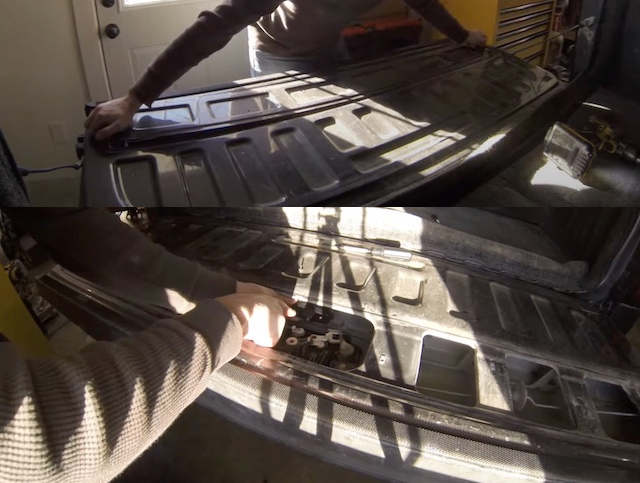
Image Credit: Eric Hoffman
Replacing a camera module for this application is a somewhat straightforward process. Here's what you need to do:
1. Remove The Access Panel On The Back Of The Tailgate
Most modern pickups with a factory parking camera in the tailgate also have other electronics built into the tailgate. Chevrolet's engineers accounted for this by designing the tailgates with a built-in access panel. It's located on the inner skin of the tailgate. Take these steps to remove the access panel:
- Open the tailgate and then leave it down.
- Remove the 8-10 Torx screws holding the panel in place.
- Set the hardware aside someplace safe. Organize and group the hardware based on size/length difference if there is any. This way, it’ll be easier to reassemble after the camera replacement is finished.
- Gently lift and remove the metal or plastic access panel on the back of the tailgate. Be sure to use caution during this part of the process to ensure no paint or metal damage occurs to other parts of the truck.
With this panel out of the way, you can examine the interior mechanical components of the tailgate assembly.
2. Remove The Camera Module
Use the known location of the camera module from the exterior panel of the tailgate to recognize the location inside of the tailgate. Once you have located the camera module, you can assess the removal method required to proceed. Typically, a Silverado camera module is held in with two bolts. Use a ratchet with the appropriate sized socket to remove the two bolts holding the camera module to the latch assembly.
Once the camera module is free from the latch assembly, unplug the module’s electrical coupler from the harness. Next, remove it from the inside of the tailgate.
3. Install The New Camera Module
Installation is simply the reverse of removal. Ensure that the bolts are snug but not overtightened. Also, make sure that the electrical coupler is securely fitted into the harness to the truck.
That's all you would need to do. It's something most Silverado owners can do at home. Please contact us if you need help finding the right replacement part(s) for your truck.